Best Secondary Weapons in Warzone 2.0 – Attachments and Tuning
If you’re looking to spice up your Warzone gameplay, or you’re sick of running average perks just to get Overkill for a loadout with two Primaries, then we’ve got you covered.
Below you’ll find three different Pistol setups to complement your Primary Weapon, each with a slightly different style than the others.
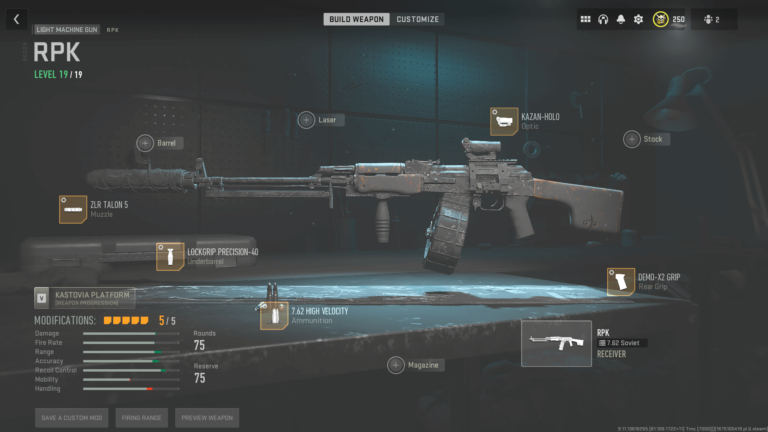
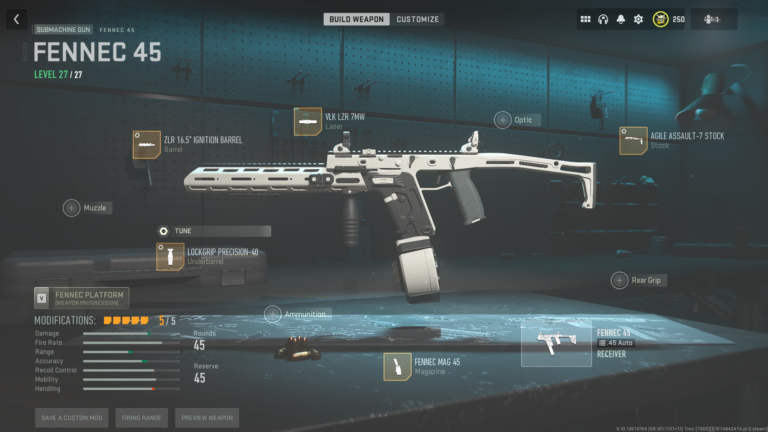
These Pistols go great with the best Primaries available right now, such as the Fennec 45 or the RPK. If you’re daring, you could also pair a set of pistols with the Signal 50, the best Sniper Rifle in Warzone 2.0 at the moment.
1. Akimbo P890s
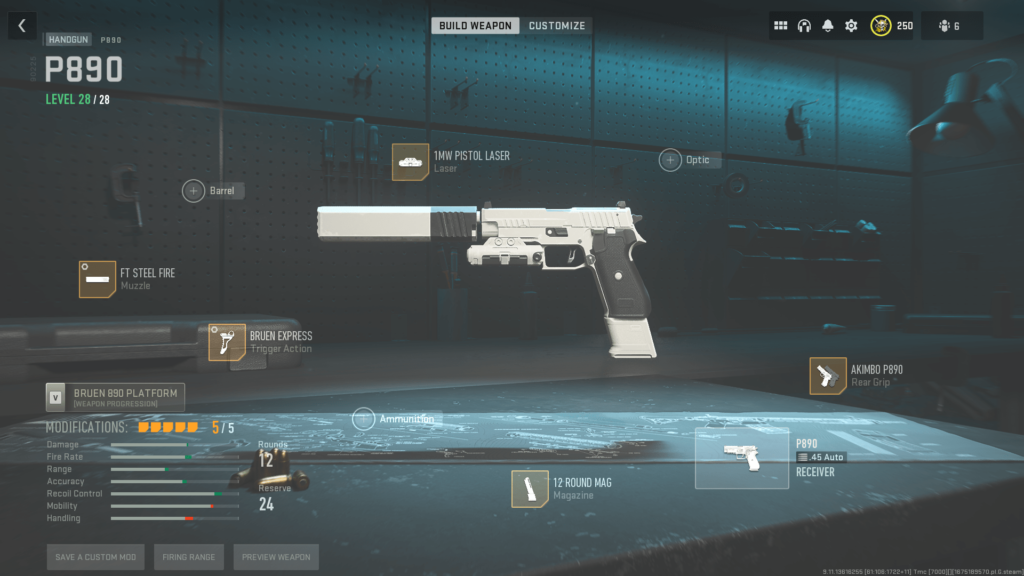
Here are the attachments for the P890:
- Rear Grip: Akimbo P890
- Magazine: 12 Round Mag
- Laser: 1MW Pistol Laser
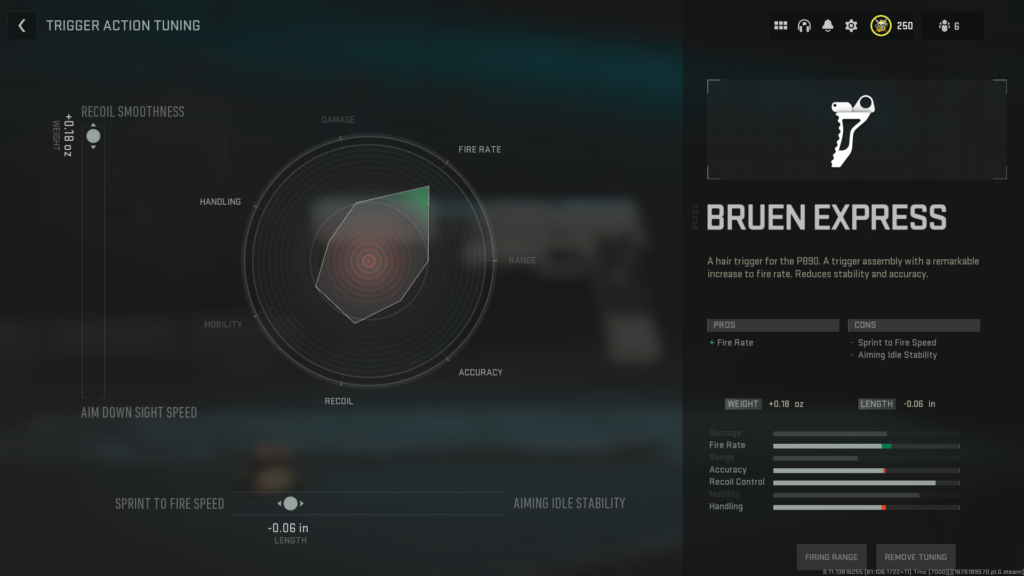
- Trigger Action: Bruen Express
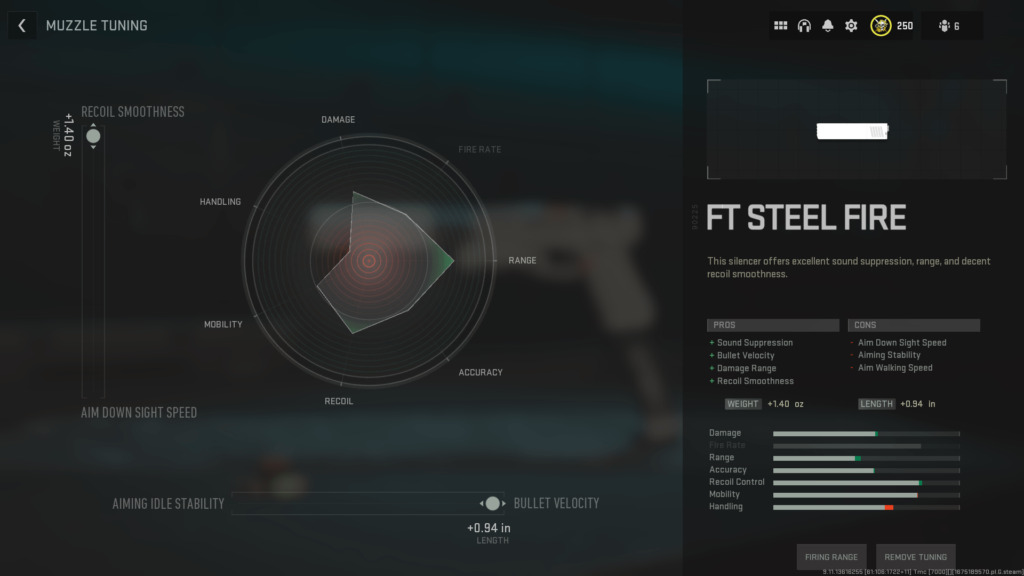
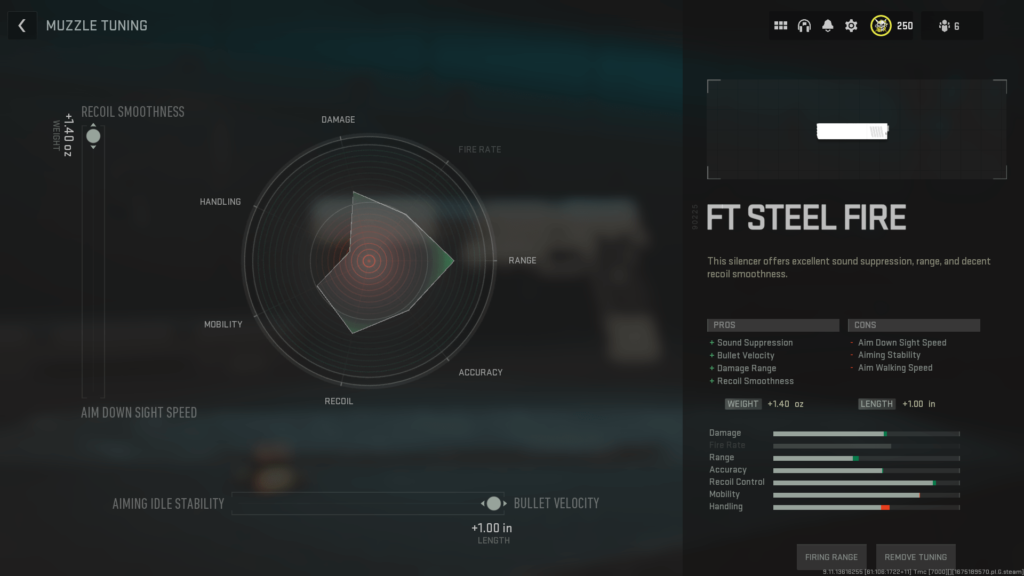
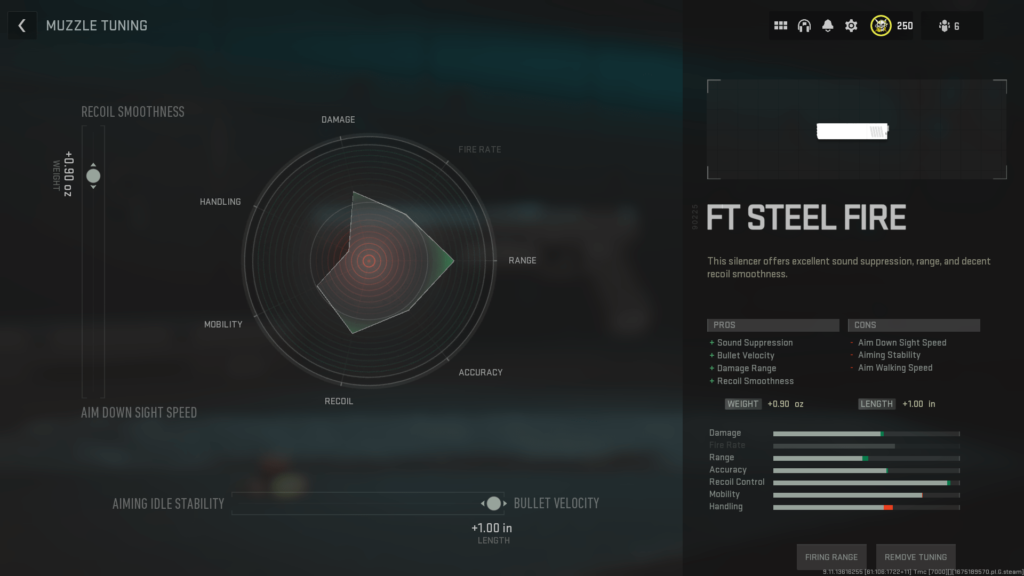
- Muzzle: FT Steel Fire
The first secondary setup we’d recommend is the Akimbo P890s. The P890 deals the most damage out of any pistol, so having two of them makes you extremely dangerous. Although these are less accurate than the X12s, the ridiculous damage in close quarters makes up for it.
First equip the Akimbo rear grip attachment, which will be found in all of our pistol setups, as dual wielding is much more effective against players with armor than a single pistol would be.
A 12-round magazine is essential for any of the squad based Warzone modes such as Quads, as you’ll potentially need to finish downed players or take on multiple enemies at once. You may be able to get away with a smaller mag when playing Warzone solo.
The 1MW Pistol Laser featured in all of the pistol builds below, is an essential choice as it gives you bright lasers for aiming both guns, along with an increase in Hip Fire Accuracy and Hip Recoil Control.
In order to rip through enemies as fast as possible, we need as high a fire rate as possible, which is where the Bruen Express trigger comes in. This attachment gives the P890s the highest fire rate possible, making them much more dangerous.
The FT Steel Fire is another attachment featured on each of our pistol setups here, as it increases Damage Range and Bullet Velocity, which makes quite a big difference for pistols due to their short range.
Below is the tuning for the P890s, and if you’re unsure how to tune weapons check out our guide here.
2. Akimbo X12s
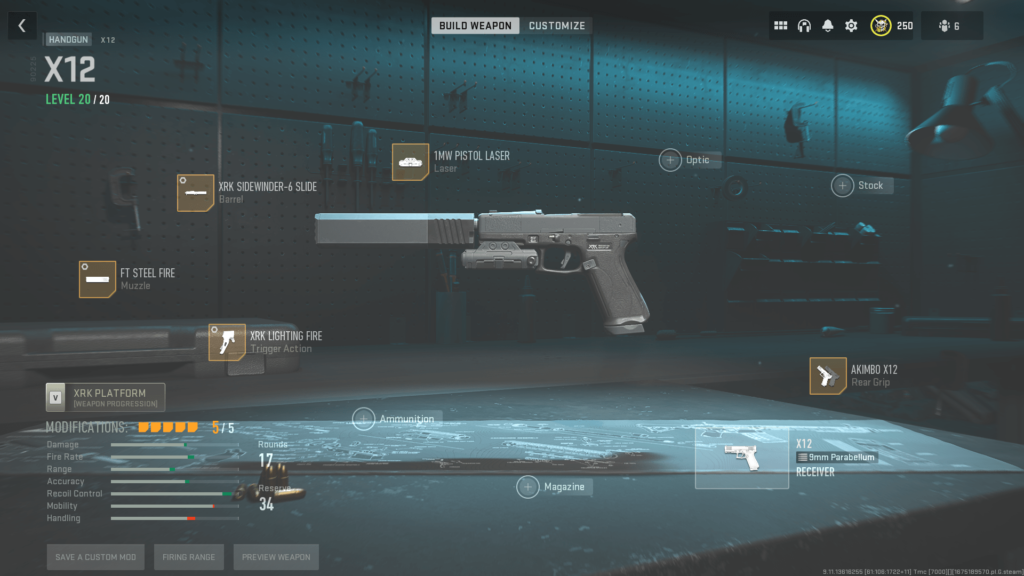
Here are the attachments for the X12:
- Rear Grip: Akimbo X12
- Laser: 1MW Pistol Laser
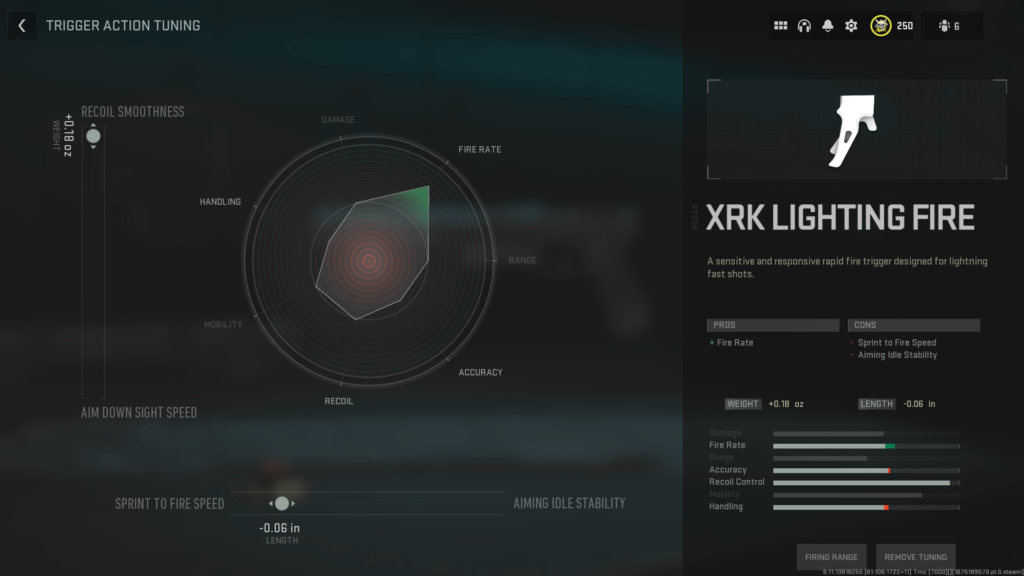
- Trigger Action: XRK Lighting Fire
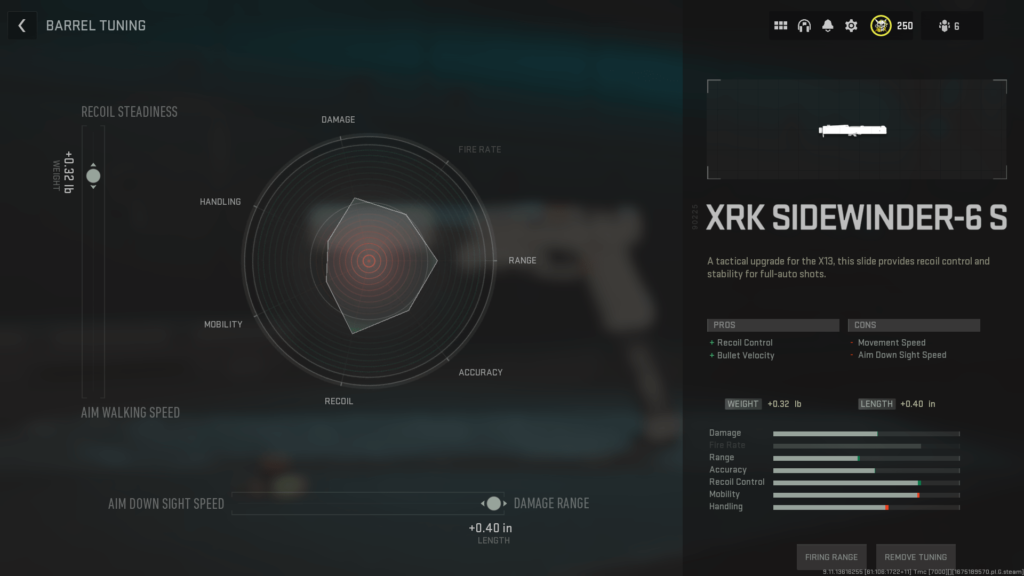
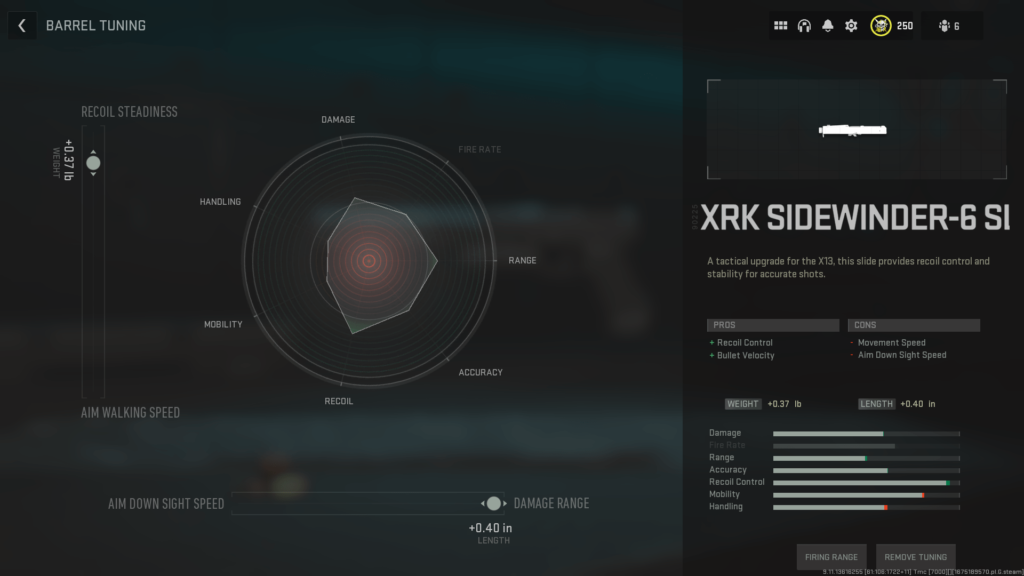
- Barrel: XRK Sidewinder-6 Slide
- Muzzle: FT Steel Fire
As opposed to the P890s, the dual X12s deal slightly less damage, but when fully tuned are extremely accurate at close range. This allows you to be further away from your targets than if you had the P890s, whilst also hitting almost all of your bullets allowing you to shred through enemies quickly.
Equip the Akimbo rear grip attachment to duel wield the pistols. This is the core part of each pistol setup as it allows you to deal nearly twice as much damage in the same time frame. Dual pistols do deal less damage to armored opponents however.
Once again we want the highest fire rate trigger in order to hit enemies as quickly as possible, so we’re going with the XRK Lightning Fire. This makes the X12s especially dangerous as they now shoot incredibly fast for the damage they output.
The XRK Sidewinder-6 barrel attachment is chosen due to the increase in Recoil Control but also comes with an added Bullet Velocity bonus, giving the weapons slightly more range.
The 1MW Pistol Laser and FT Steel Fire advantages have been listed in the P890 setup above, and the tuning for the X12 attachments are found in the images below.
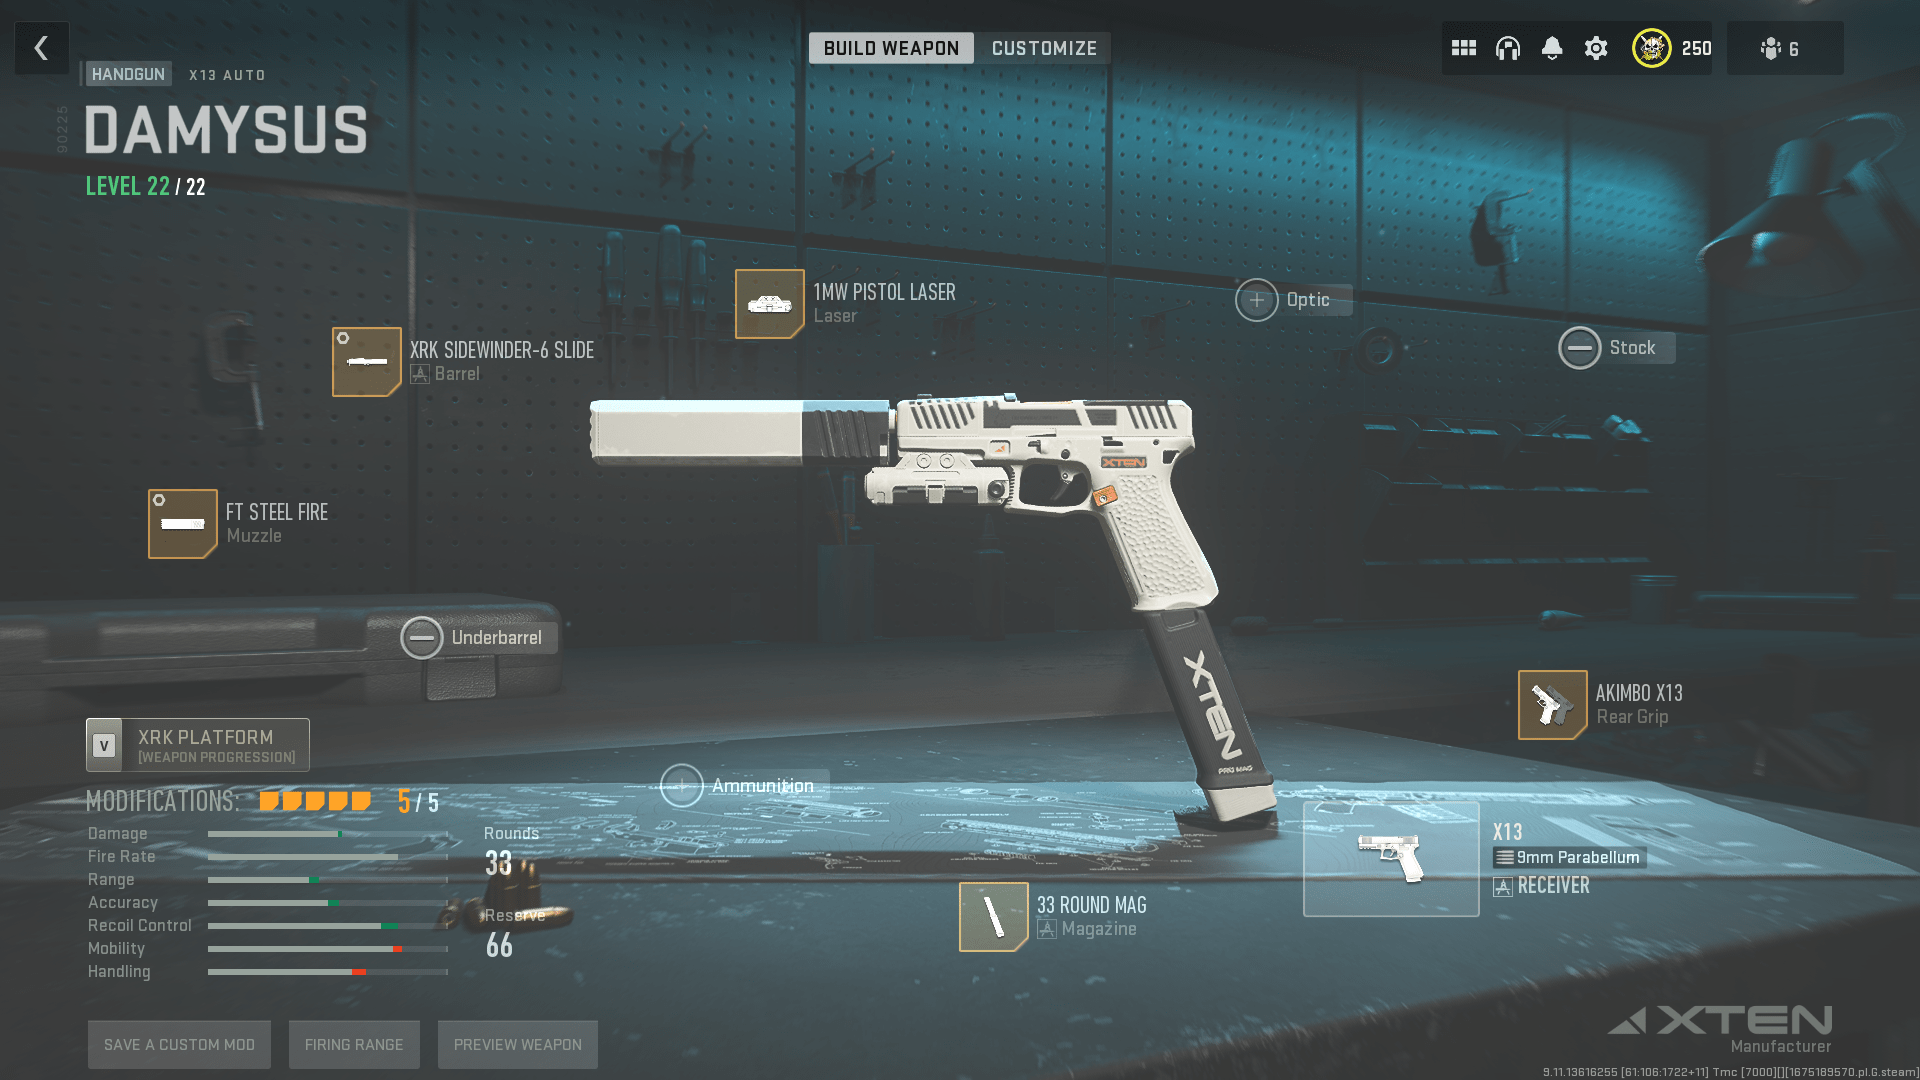
3. Akimbo X13 Autos

Here are the attachments for the X13 Auto:
- Rear Grip: Akimbo X13
- Magazine: 33 Round Mag
- Laser: 1MW Pistol Laser
- Barrel: XRK Sidewinder-6 Slide
- Muzzle: FT Steel Fire
As usual we’re equipping the Akimbo attachment, this time with a 33 round magazine for the X13s. 33 is a good middle ground, as 50 impacts the recoil quite a lot, and 17 bullets may be barely enough to deal with at maximum one player.
All the other attachments on the X13 have been outlined in the previous builds, but you can find the best tuning for the X13s below.